If I were to come on strong dear reader, I could fool you into thinking that my perfectly pointing (Farrow & Ball) painted house was having a retouch before the silly season comes around again, whereby my beautiful house will be smelling of cinnamon & orange and my 'warm glow' fairy lights on my perfectly John Lewis Christmas-decked tree sat oh-so-beautifully in the window. Yeah right.
Meanwhile in the real world, the babes have been murmuring more about Christmas and dh & I are beginning that - Oh gosh..where are we going to find that extra £200 for the presses and another £200 on nosh and a couple of stunning bottles of vino. Fret not, we will find them...we always do somehow or another.
For my after-school art class group of 8 little faces (I love doing them) I realise that my minor punters have to take home somethings Christmassy, preferably made over two weeks to enhance the anticipation of their delivering it on Christmas morning...queue...clay.
Researching through my books, I found the sweetest little nativity set in my '101 things to make a do' book, by Parragon. I love this book, given to DS around his 5th birthday, we dip in every so years and find motivation to make all sorts of things I wouldn't normally dream of. One Christmas we made everyone in the family a velvet-fabric crown...this was quite probably the dawning of my realising that I rather enjoyed making things with children...who knew?!
So...in preparation for my art-class, I decided to test out said project with my own. Both DS and DD loved it from start to finish. My question really was air-drying clay or air model-fix (more expensive) so we made two (like we said..perfecto for the grannies gifts from the babes)
How to make an 'IDDY BIDDY LITTLE NATIVITY SCENE'
Things needed:
Air Clay or Air Modelling Clay. A good handful
Paint, the list states acrylic but I used thickish watercolour too.
Black marker pen...(not essential but handy if to hand)
1.
Warm up your clay/substance in your hand for a good while until its soft to play with and shape.
2.
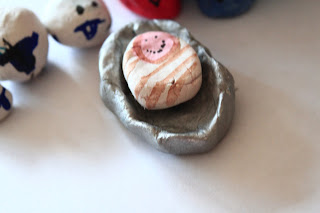
Firstly make the cave, shape the arch to be about the size of your hand cupped. The figures should be about thumb sized and quite rounded. Baby Jesus is fantastic, to make said figure, roll your clay to a thickish flat oval about the size of a 50p coin at the largest and give it a push with your thumb...thats it! The cot is to be big enough to fit the baby in and bed-ish!
To begin with we made Mary & Joseph, the cot and baby Jesus, along with 3 sheep, Granny will be delighted with that! On later models (ahem) I will add in the Three Wise Men and some more animals me thinks.
3.
Once you have your wee figures, stand back! Put onto a tray or a plate and leave in the airing cupboard overnight (it's quite exciting)
4.
Time to paint. Here is the interesting bit. I had expected the clay to be much easier to paint but the modelling air stuff was good too. Either is fine.
Am sure you don't need me to tell you that you need a face, some arms, a head scarf and a headband on your wee figure. The sheep were fab...will draw up a simple template this afternoon and scan it in...for now...herewith one two we made earlier (have ALWAYS wanted to say that!)
Well done everybody, dead simple, very engaging and perfect for doing together.
Enjoy x


I am going to try this with my class next week... Im so looking forward to it. Thanks for such a great idea :)
ReplyDelete